Posted by

Almost Done with the Retaining Wall

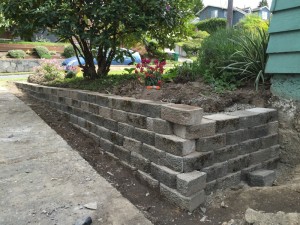
I spent the better part of Saturday hauling bricks up from the backyard, stacking them, and backfilling with pea gravel.

So the wall is mostly done.  Except…  I still need to make the back corner look nice, which will likely involve renting a masonry saw from Home Depot to custom cut some blocks to fit.  We’re also thinking of topping the wall with a course of capstones.

IMG_0071.JPG

Posted by

More Retaining Wall Progress

With the stump hacked back, I was able to get the trench dug out and get the first course of blocks put in.  It took all day… slow progress because it takes a lot of time to level the dirt, compact it, add the gravel base, compact it, and double check that it’s level and the right height. 


Now my back hurts but I’m feeling better because I’m eating sushi with Sarah, Caroline, Brady, and Megan!
 

Posted by

Starting Work on the Front Yard Retaining Wall

Digging out back to the property line.

Actually digging only took about an hour.  Most of yesterday was spent trying to remove this huge stump!

Posted by

Bathroom, Phase A, Part 2 (Painting!)

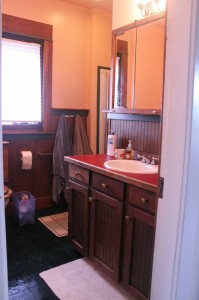
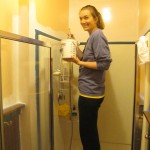
We’ve gotten pretty behind with posting about house updates but fortunately we have continued to make (slow) progress on the house. We finished the first round of bathroom painting almost two months ago now! We started with salmon walls and ceiling (the color really doesn’t come across in the photos, but trust us – it was PINK).

Vanity

Vanity

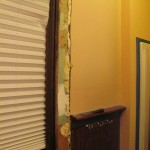
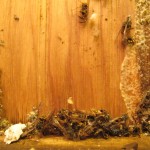
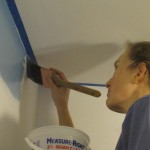
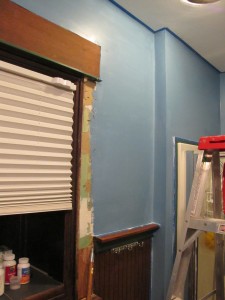
We picked white for the ceiling and blue for the walls. Trying to tape off the window framing was challenging as the frame did not sit flush with the wall. Jake thinks whoever installed the sheet rock used the wrong size, leaving a gap and leading someone to fill it with foam. We made an on the spot decision to tear off the framing, uncovering a nice mass of dead flies and other general nastiness.

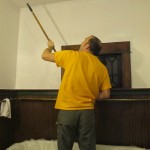
We then went ahead with priming and painting, which was pretty uneventful aside from having to maneuver around the bathtub.

We knew we were making progress after just the first coat of priming!

We knew we were making progress after just the first coat of priming!

We are really happy with the color! We’re planning to move on to painting the bead board soon…

IMG_4695 IMG_4697


Posted by

Bathroom, Phase A, Part 1

We have been a bit remiss in keeping this blog up-to-date with our goings-on around the house, but we’re going to try to get caught up over the next couple of weeks.  First up is the bathroom work we did around Thanksgiving.

(Incidentally, Thanksgiving went very well.  I did a little work to level the stove and adjust the calibration of the thermostat and it did its job like a champ.  With Sarah’s meticulous timing plan and the experience of our earlier practice Thanksgiving, everything came out delicious!)

A new tablecloth and awesome glass pumpkins from Caroline!

A new tablecloth and awesome glass pumpkins from Caroline!

For the record, the long-term plan for the bathroom looks something like this:

  • Phase A – make the current bathroom nicer.
    • Remove the heat lamp and re-do the electrical to accommodate.
    • Rehang to door.
    • Paint the ceiling and (upper) walls (over the salmon color).
    • Paint the bead board and trim.
    • Make the door and window trim flush to the wall.
    • (Maybe) replace the green linoleum flooring.
    • Refinish the tub.
    • Replace the red formica on the counter with a neutral color.
    • Add a tile backsplash.
  • Phase B – completely gut the bathroom if and when we remodel the upstairs*.

As a reminder, the heat lamp in the bathroom was non-functional (unless its function was to make you think that HAL9000 was watching you in the shower), as was the fan part of the fan/light.  Up in the attic, I saw that in addition to removing the heat lamp and fixing the fan, I would need to replace the vent duct, as the old one was a moldy tangle.
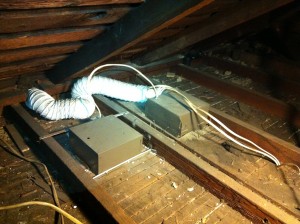
I installed some of that semi-rigid flex ducting and a 90 degree elbow.  (I have no idea why the vent hole through the soffit was installed in-between the wrong set of joists—just another one of those mysteries left by previous owners.)  At some point, I’ll need to install a screen on the outside to prevent birds from exploring the vent.
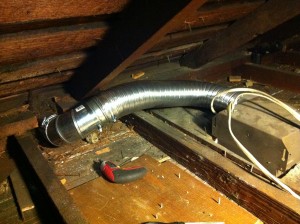
I got to it, first pulling out the heat lamp and then removing the motor for the fan and ordering a replacement from Amazon.
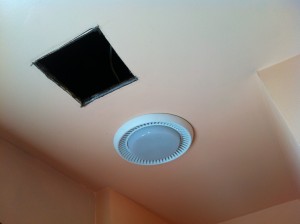
 

It took me a while to figure out how everything was wired up to the switch plate in the bathroom, but once I did (adding helpful labels for future Jake and Sarah), I was able to remove the old wiring for the heat lamp.  I even found that the fan has a small night light in addition to the main light, so I wired that in as well (in hindsight, it’s not very useful and I’ll be disconnecting that switch).  I also replaced the switch for the fan with a timer.  Once the replacement fan motor arrived, I epoxied the old fan blade onto it and stuffed it back in.  It felt pretty good to have my first electrical work project go relatively well.

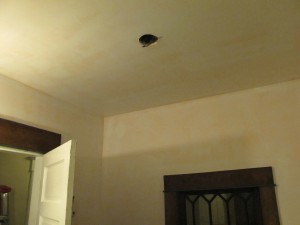
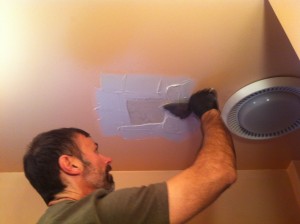
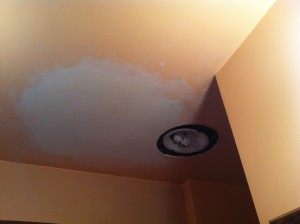
Patching the hole was a different matter.  Going into the project it seemed like something that would be interesting to try, but when my brother in law, Mike, showed up for Thanksgiving dinner he jumped in to help (he did a lot of sheetrock work back in the day).  We salvaged a scrap of drywall from the basement and screwed it up there with a piece of old plywood as backing, and he showed me the basics of mudding over it.  I took a turn at it but it’ll take some practice before I’m anywhere near adequate.  I’m glad Mike was there to help out—the end result looks great and you can’t tell there was ever a hole there.


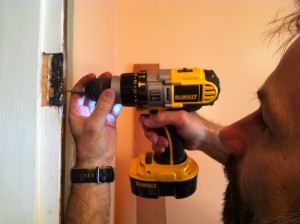
Mike also helped re-hang the door.  The screw holes for the hinges had been stripped and were barely hanging in there via toothpicks stuffed into the holes.  Mike filled them with epoxy and re-drilled pilot holes, as well as adding screws crosswise through the jamb to shore up a couple of spots where it had cracked.
I’m not sure if Mike knows how much future work he’s signed himself up for by being so helpful!

Next post, we’ll tell you how the painting went.  I bet you can’t wait!

* We have crazy plans for the second floor which involve a complete roof replacement (so the eaves don’t cut off so much space in the front and back bedroom) and reconfiguring all the rooms to add a second upstairs (master) bathroom, make the master bedroom bigger and add closet space, and split the front bedroom into two.  What could go wrong?

Posted by

Another Storm, More Basement Shelves

We haven’t made a lot of progress on the house lately, with Sarah on a heme-oncology block last month as well as lots of fellowship interviews.  We are still planning on tackling the upstairs bathroom very soon, but I wanted to finish out the basement shelves to get the last of the clutter organized before we do so.

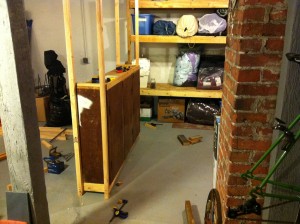
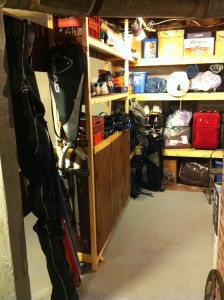
Yesterday, we had a pretty huge windstorm with 50–60 mph winds around Puget Sound.  From upstairs, you could even feel the house wiggling when the bigger gusts hit!  It seemed like another good day to stay indoors, so I headed down to the basement and finished up the shelves.  I had taken out some cabinets from the shop area of the basement to make room for another work table, so I started by mounting those to form the start of a third wall in our storage area.
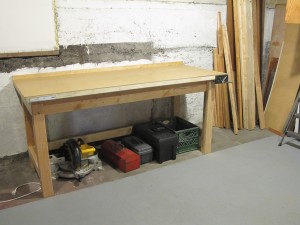
Then I added shelves on the far side, in-between the cabinet and the shelves I built last month, and also added shelves above the cabinets.  Now we have a place for our skis, tennis stuff, and biking and running gear.

IMG_1150


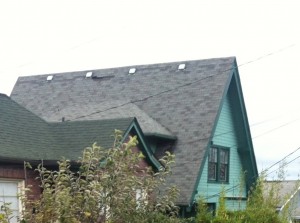
After the wind had calmed down a bit we decided to walk over to the library (and to pick up our monthly wine subscription from Madrona Wine Merchants, our awesome neighborhood wine shop who specialize in super delicious wines at crazy low prices, and awesome puns.  Yesterday they gave me a free t-shirt that says “Bordeauxing on insanity!”).  When we left the house, we saw that the wind had gotten ahold of some of the shingles on our very steep roof…  so we’re going to have to add roof repair to our TDL.  You can see the shingles flapping away in this photo:


In other news, last week I was reading in bed and while I nodded, nearly napping, suddenly there came a tapping, as of some one gently rapping, rapping at my chamber door.  After many attempts at sticking my head out the window to see where it was coming from, on Friday I finally saw the culprit—not a raven (where would you have gotten that idea?), but a woodpecker, trying to bust into the attic from just under the peak of the root.  Sarah’s been doing some research on how to deal with him, but in the meantime, we’ve also added “deal with woodpecker” to the TDL.

We really are going to get started on the bathroom this week.  We’re also going to be hosting my family for Thanksgiving, so we’re planning that, and I’m going to try to work on our cranky old stove a bit.  I’ll at least level it, and probably look into cleaning the burner jets as well.

We only had two trick-or-treaters for halloween, but we went to dinner during the peak hours so we’ve concluded that Madrona is a trick-or-treat friendly neighborhood.  We’re looking forward to handing out more candy next year.


Posted by

Rainy Weekend Basement Shelves

It rained uncommonly hard in Seattle this past weekend.  You might be surprised to learn that it’s not all that rainy in Seattle; it’s just usually overcast and slightly damp (with amazingly gorgeous summers!).  It rains most days in the winter, but it rains less than 20% of the time (hour-wise) even in our rainiest months.  But this past weekend, we got something like four inches of rain, and it was quite windy to boot.

What to do?  Sarah had a rare day off on Saturday and a couple of library books that come due soon, so she got under a blanket and kept the couch from floating away.  Reading and watching the weather show was tempting to me, but instead I retreated to the basement to try to build some shelves and get our mess organized.

It’s been a while since we posted here, but you’ve been killing time by re-reading our older posts, so you’ll recall that I discussed the less-than-useful shelves that were left in the basement for us:

Slightly more useful than an inflatable dartboard.

Slightly more useful than an inflatable dartboard.

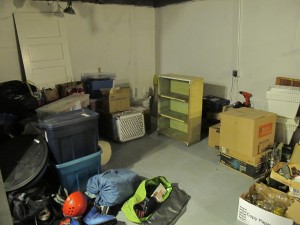
And you’ll recall that nothing really fit on them, leaving most of our basement a pile of mess:

Clutter much?

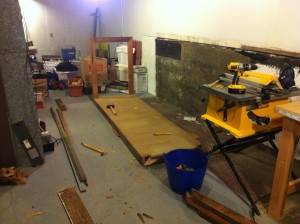
So, with the rain hammering on our windows, I put some tunes on the boombox, grabbed my four-pound hammer and my wrecking bar, and put those poor shelves out of their misery.

IMG_1091

Definitely not the worst way to spend a rainy Saturday.  Incidentally, this being our first big rainstorm since we bought the place, I was glad to find zero evidence of any leaking in the basement.  So I’ve got that going for me, which is nice.

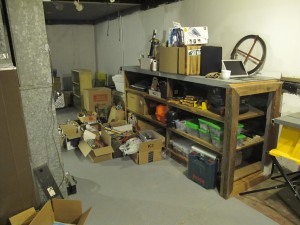
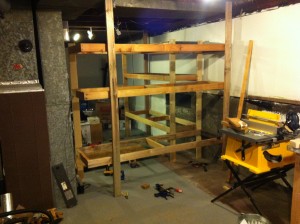
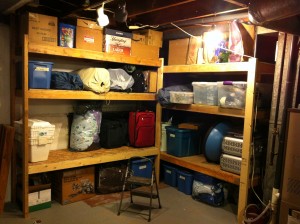
With that taken care of, yesterday I got  busy building some more useful shelves.  I framed them out with 2×4’s I got from the neighbors and from my friend Joe:

IMG_1100


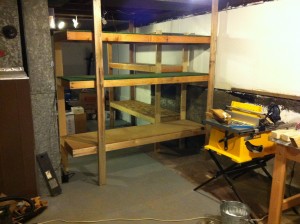
Then I cut shelves from scrap particle board and MDF.

IMG_1101

IMG_1102


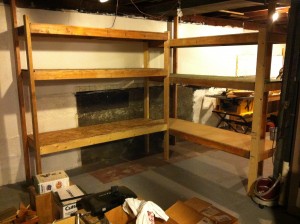
The shelves are able to hold most of the boxes and miscellaneous randomness that was cluttering our basement.

IMG_1103

The basement is mostly clutter-free now, with the exception of my ski gear and golf clubs, plus some boxes and things for the Goodwill.

IMG_1104


I think that someday soon, I’ll add a third wall of shelves, and some custom storage for our skiing, climbing, and tennis gear.  But next in the project queue is to get started on the bathroom.


Posted by

Garden update

August garden

August garden

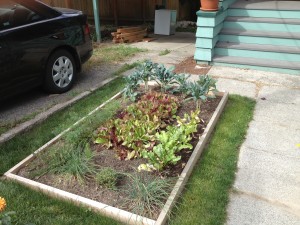
The garden got a little neglected during the past month while I was on a busy inpatient rotation. We have been having great lettuce for a while now, but it has recently turned bitter and I pulled it up today to make room for spinach and arugula. We could harvest the beets at any time and I pulled up a carrot today that was very tasty.

A carrot! (It IS supposed to be white)

A carrot! (It IS supposed to be white)

I think the zinnias are my favorite thing to have come out of the garden so far:


We have learned a lot with this year’s practice garden. Our biggest mistake was probably getting behind with watering. Next year we will have to do soaker hoses.

Posted by

Bathroom plans

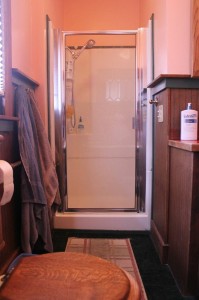
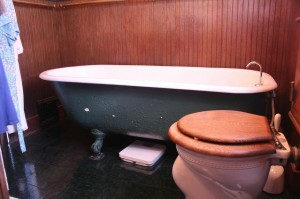
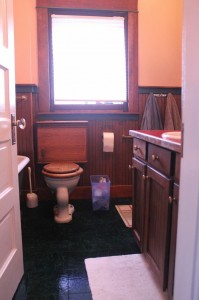
Having a whole house to decorate and update has been overwhelming. We’ve spent a lot of time talking about what projects we’d like to do, some big (e.g. completely redo the roof to make it less steep and allow us to expand the footprint of the second story) and some small (e.g. hanging coat hooks). We are finally feeling ready to tackle a whole room and have decided to start with the ugliest: the bathroom. It’s our most colorful room, but we’re just not fans of the former owners’ choice of combining hunter green (tile floor, bathtub and trim), brick red (counter top), and peach (walls and ceiling).

Vanity

Vanity

Shower

Shower

Tub

Tub

Toilet

Wooden Toilet

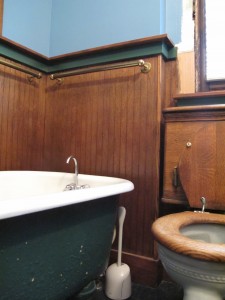
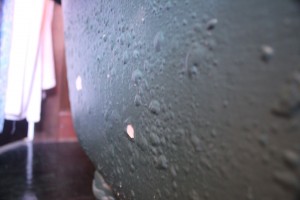
We do like the teak toilet with its funky flush mechanism and the claw foot tub. We’re talking about repainting the tub since it’s covered in paint bubbles that have been bursting and we’ll have to move it anyway to get to the paneling behind it. But we’ve been back and forth about whether to put the tub back in or use the space for some more storage.

Poorly painted tub

Poorly painted tub

We’re not planning on any huge overhauls but we think some paint will go a long way in here. Our current plan:

    • paint the wood paneling, trim and cabinet white
    • paint the walls some undecided color (probably a shade of blue)
    • paint the ceiling white
    • put in a white tile backsplash behind the sink
    • change out the formica for a more neutral color
    • remove the old heat lamp by the shower that doesn’t work and patch the ceiling where it was
    • fix the fan that has never worked

Posted by

I Built a Workbench

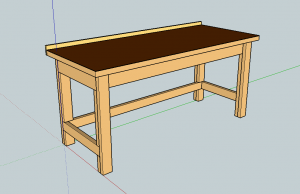
I finally got a workbench up and running in the basement this past weekend.  Since the design was super complicated*, I started by modeling it in SketchUp (I found some video tutorials at Sketchup For Woodworkers):


workbench


I think it turned out pretty well:

IMG_4546


It’s basically some 2×4’s screwed together with a solid core door ($45 at Lowe’s) on top, and some hardboard over that.  I’ve had that vise for something like ten years now and have never used it until now.  But I’m not a hoarder*, really.

On a related note, the space where it’s located is where there used to be some not-very-useful shelves which I spent a good portion of the previous Saturday knocking out with a 4lb hammer and a wrecking bar (and a dusk mask and my inhaler).  There is still a lot of old shelving and cabinetry down there that needs to go (don’t worry, the secret train storage compartment is staying)—the shelves that came with the house are about nine inches above one another, which is not enough space to store most of the stuff that’s currently scattered about the basement floor.

Slightly more useful than an inflatable dartboard.

Slightly more useful than an inflatable dartboard.

You thought we had actually moved into this house?

I had a nice neighborhood moment last week though… Shortly after we moved in I was walking to work and some folks were banging together a wheelchair ramp outside a house a couple blocks down the hill.  A few weeks later, I saw that the ramp had been disassembled (I am assuming that whomever needed the wheelchair got better…) and the lumber was stacked in the driveway.  I must have walked by it thirty times on my commute before I finally stuck a note on it a week ago saying that I would haul it away if they didn’t need it.  A few days later, I got a call and scored about about a hundred bucks worth of free lumber!

So, soon, the less-than-functional shelves will be gone and a neighbor’s wheelchair ramp will have a second life as our basement shelving.  Lots and lots of basement shelving…

*Seriously, not at all…

Subscribe